In this article, you will learn to create a Functional endpoint in Spring WebFlux. In the previous article, I have introduced you to create an endpoint using the Annotations, now we will look into the pure functional programming way to achieve this.
1. Overview of Functional endpoint

An Http request initiated by a client app arrives at the Server (Netty/Undertow etc.). This request is forwarded to the RouterFunction to assign an appropriate HandlerFunction to serve the Http request. The RouterFunction is similar to @RequestMapping and the HandlerFunction is similar to the body of @RequestMapping method in the annotation-driven programming model.
2. Functional reactive endpoints
We will use the standard start.spring.io to generate the starter Spring-Boot-WebFlux project to implement functional endpoints. The most important dependency that you need is spring-boot-starter-webflux. You can use Spring WebFlux without the SpringBoot, but we will make use of Spring boot in all of our examples.
We will generate our Spring WebFlux project from start.spring.io, with the dependency spring-boot-starter-webflux. Other dependencies are for testing and ease of development. Use the link to generate the project, unzip it, and import it to your IDE.
  <parent>
    <groupId>org.springframework.boot</groupId>
    <artifactId>spring-boot-starter-parent</artifactId>
    <version>2.3.0.RELEASE</version>
    <relativePath/> <!-- lookup parent from repository -->
  </parent>
....
  <dependencies>
    <dependency>
      <groupId>org.springframework.boot</groupId>
      <artifactId>spring-boot-starter-webflux</artifactId>
    </dependency>
  <dependencies>
.....As mentioned before, Handler functions are the ones which serves the actual endpoints. So, you need to write the logic inside the handler functions to serve these endpoints. We will create a class asHelloHandler with two methods. One will serve us the TEXT_PLAIN and other one to serve APPLICATION_STREAM_JSON content.
package c.jbd.webflux;

import org.springframework.http.MediaType;
import org.springframework.stereotype.Component;
import org.springframework.web.reactive.function.server.ServerRequest;
import org.springframework.web.reactive.function.server.ServerResponse;
import reactor.core.publisher.Flux;
import reactor.core.publisher.Mono;
import java.time.Duration;

@Component
public class HelloHandler {
  /**
   * Serves a plain_text
   */
  public Mono<ServerResponse> monoMessage(ServerRequest request) {
    return ServerResponse.ok()
      .contentType(MediaType.TEXT_PLAIN)
      .body(
        Mono.just("Welcome to JstoBigdata.com"), String.class
      );
  }

 /**
   * Serves a JSON stream
   */
  public Mono<ServerResponse> fluxMessage(ServerRequest request) {
    return ServerResponse.ok()
      .contentType(MediaType.APPLICATION_STREAM_JSON)
      .body(
        Flux.just("Welcome ", "to ", "JstoBigdata.com")
          .delayElements(Duration.ofSeconds(1)).log(), String.class
      );
  }
}
package c.jbd.webflux;

import org.springframework.boot.SpringApplication;
import org.springframework.boot.autoconfigure.SpringBootApplication;

@SpringBootApplication
public class FunctionalAppConfig {
  public static void main(String[] args) {
    SpringApplication.run(FunctionalAppConfig.class, args);
  }
}
We have the logic in the HelloHandler to serve the response. Now, we will write our router function in HelloRouter class to bind the specific endpoints. Basically, every endpoint will be linked to the specific router function.
package c.jbd.webflux;

import org.springframework.context.annotation.Bean;
import org.springframework.context.annotation.Configuration;
import org.springframework.web.reactive.function.server.RequestPredicates;
import org.springframework.web.reactive.function.server.RouterFunction;
import org.springframework.web.reactive.function.server.RouterFunctions;
import org.springframework.web.reactive.function.server.ServerResponse;

@Configuration
public class HelloRouter {

  @Bean
  public RouterFunction<ServerResponse> functionalRoutes(HelloHandler helloHandler) {
    return RouterFunctions
      .route(RequestPredicates.GET("/functional/mono")
        , helloHandler::monoMessage)
      .andRoute(RequestPredicates.GET("functional/flux")
        , helloHandler::fluxMessage);
  }
}
Step-4: Start the App and Test the endpointsIt is recommended to declare the Router Function class using
@Configurationsannotations, and the router functions as beans.
Start the app by running mvn spring-boot:run
To test the Mono endpoint, open the below url in the browser.
http://localhost:8080/functional/monoYou will be able to get the message, Welcome to JstoBigdata.com on the browser. There is nothing special here.
Similarly, to test the Flux endpoint, open the below url in browser and observe the output.
http://localhost:8080/functional/flux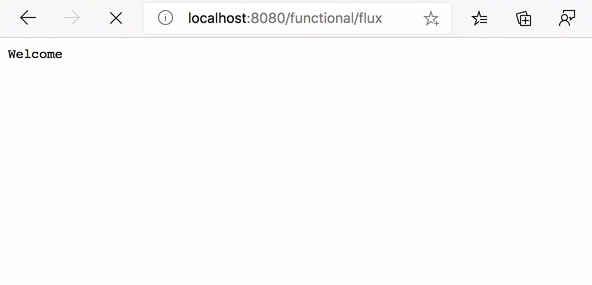
You can see that the message gets printed on the browser part by part. This is because our endpoint sends the message as a JSON stream part by part in after each second, with the help of a Flux stream.
3. Test the endpoints using WebTestClient
The spring-test module provides mock implementations of ServerHttpRequest, ServerHttpResponse, and ServerWebExchange. The WebTestClient is built on these mock request and response objects to provide support for testing WebFlux applications without an HTTP server. You can use the WebTestClient for end-to-end integration tests, too.
package c.jbd.webflux;

import org.junit.jupiter.api.Test;
import org.springframework.beans.factory.annotation.Autowired;
import org.springframework.boot.test.autoconfigure.web.reactive.AutoConfigureWebTestClient;
import org.springframework.boot.test.context.SpringBootTest;
import org.springframework.http.MediaType;
import org.springframework.test.web.reactive.server.WebTestClient;
import reactor.core.publisher.Flux;
import reactor.test.StepVerifier;

@SpringBootTest
@AutoConfigureWebTestClient //Important
public class FunctionalAppTest {

  @Autowired
  private WebTestClient webTestClient;
  private final String TEST_MESSAGE = "Welcome to JstoBigdata.com";

  @Test
  public void testMonoEndpoint() {
    Flux<String> msg$ = webTestClient.get()
      .uri("/functional/mono")
      .accept(MediaType.TEXT_PLAIN)
      .exchange()
      .expectStatus().isOk()
      .returnResult(String.class).getResponseBody()
      .log();

    StepVerifier.create(msg$)
      .expectNext(TEST_MESSAGE)
      .verifyComplete();
  }

  @Test
  public void testFluxEndpoint() {
    Flux<String> msg$ = webTestClient.get()
      .uri("/functional/flux")
      .accept(MediaType.APPLICATION_STREAM_JSON)
      .exchange()
      .expectStatus().isOk()
      .returnResult(String.class).getResponseBody()
      .log();

    StepVerifier.create(msg$)
      .expectNext(TEST_MESSAGE)
      .verifyComplete();
  }
}
Conclusion
I have given you a brief guide on creating functional endpoint in Spring WebFlux. We will explore much more in the upcoming articles. Reactive programming provides better performance with limited hardware as compared to the traditional Spring MVC with too many threads. I would suggest trying this framework to see if this fulfils your project needs. You can download the complete source code from Github.