In this article, we will setup Glassfish for JMS 2.0, create a Java project and add the necessary dependencies.
Prerequisites
Please make sure you have the following tools installed on your system.
- JDK 8 installed. Not tested with any higher version of Java.
- Eclipse, STS or IntelliJ IDEA.
Steps for Glassfish installation and setup
Step-1, Download the Glassfish and Unzip
You need to download the Open Source Glassfish version from the Glassfish GitHub repo and then unzip it to a folder from where we will run the server. I am using GlassFish 5.0 with JDK 8.

Step-2, Start the Server
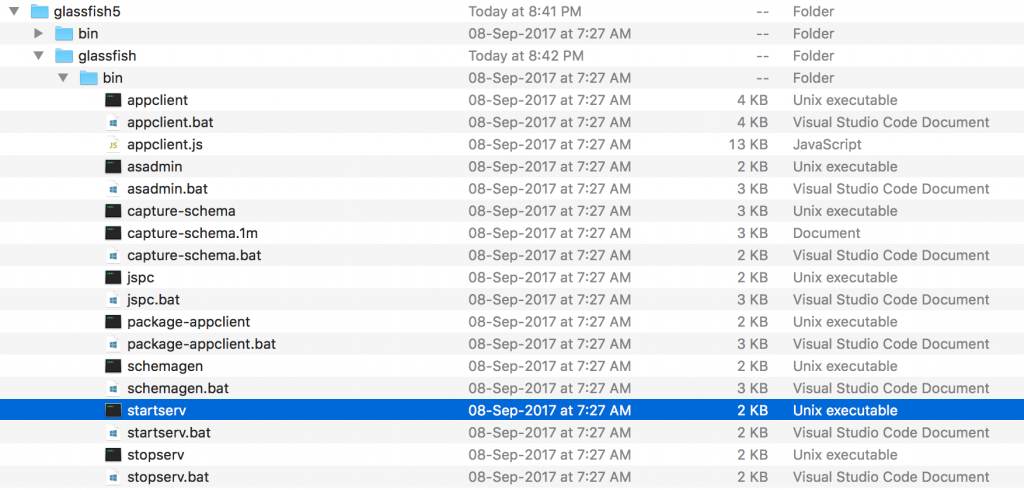
Navigate inside the extracted folder to start the server, cd glassfish5\glassfish\bin\from terminal.
Run sh startserv from the terminal, if you are on Mac or Linux. OR, run the startserv.bat, if you are on Windows. Allow the server some time to bootstrap.
Step-3, Open the Admin Console
Once you are done with the above steps, next is to visit the Admin console on http://localhost:4848.
Now, take a look at the “JMS Resources/Connection Factories“, you can see the default JMS factories that Glassfish has created for you. We will use this jms/__defaultConnectionFactory throughout the course.

Step-4, Create JMS destination resources
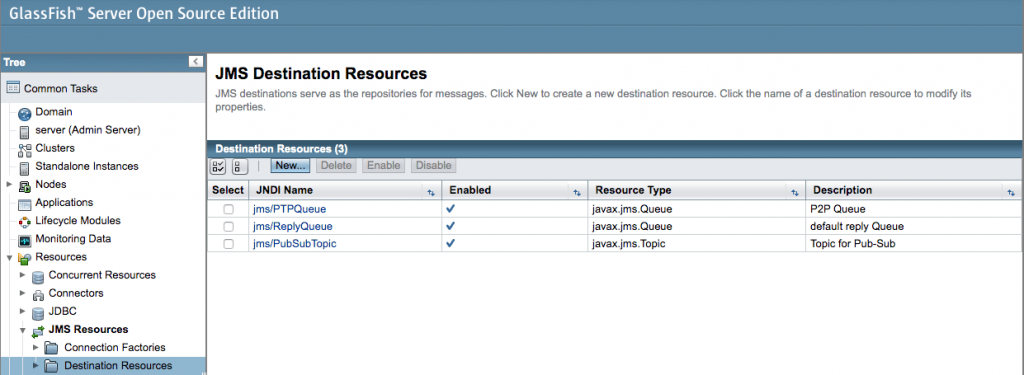
By default, there will be no destination resources listed on your Glassfish admin console. Remember you need to create these resources first, then write your code to send or receive messages via these resources.
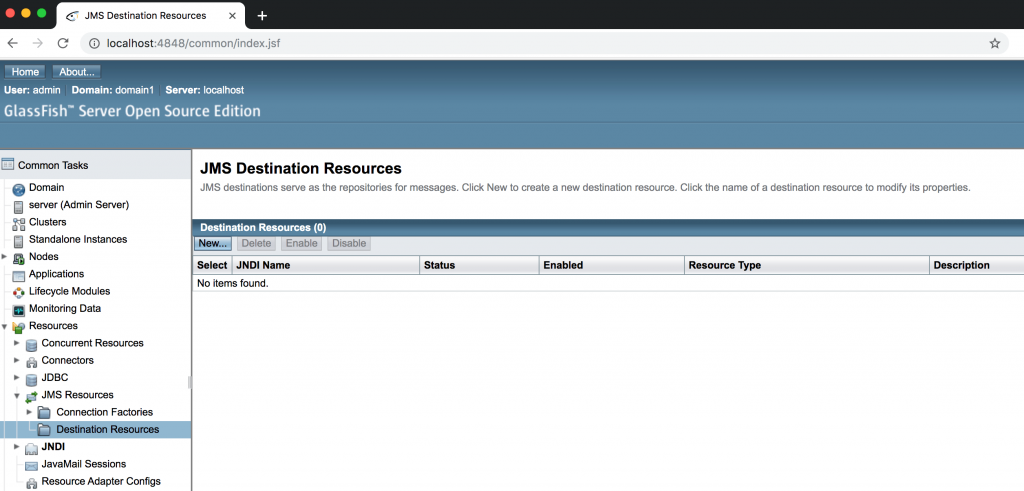
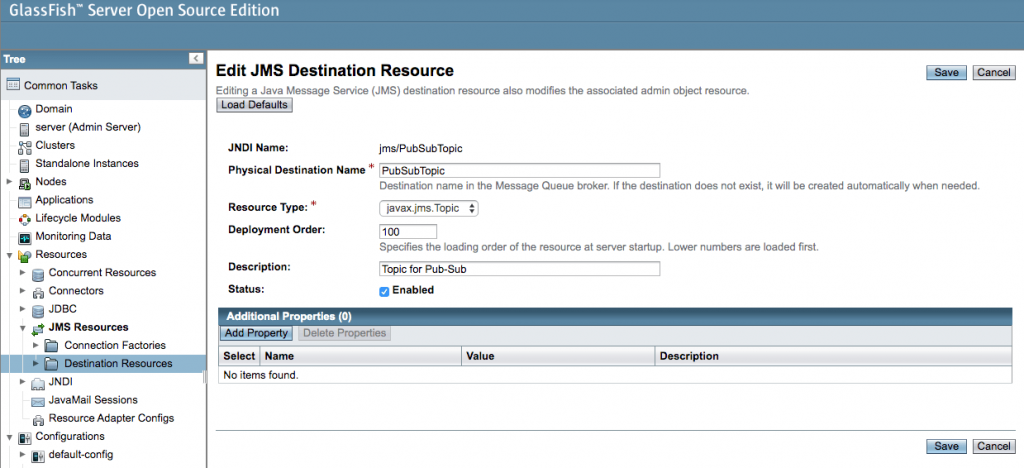
Click on the New button to add new destination resources, we will create 2 Queues and one Topic for the examples to work as shown below.
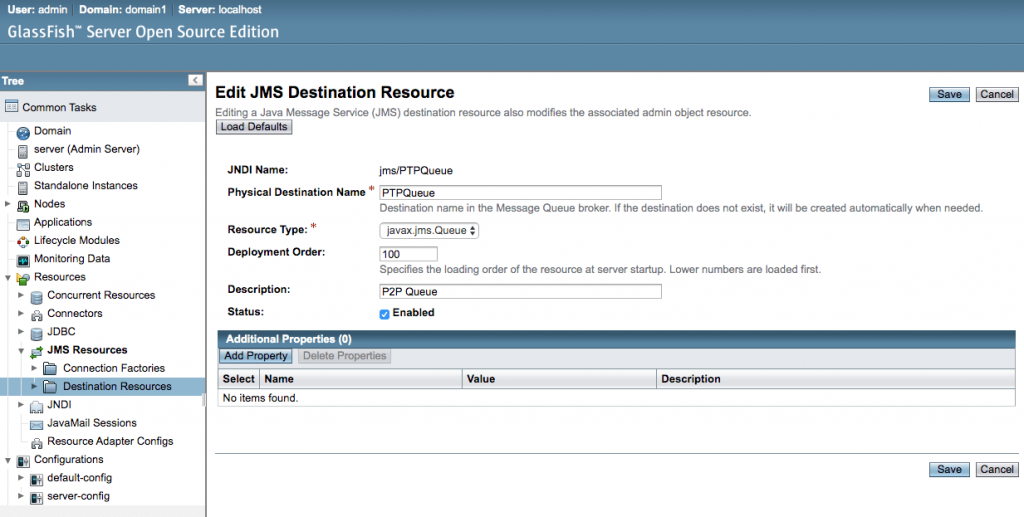
- Create queue1 with the JNDI name as
jms/PTPQueueand destination namePTPQueue.
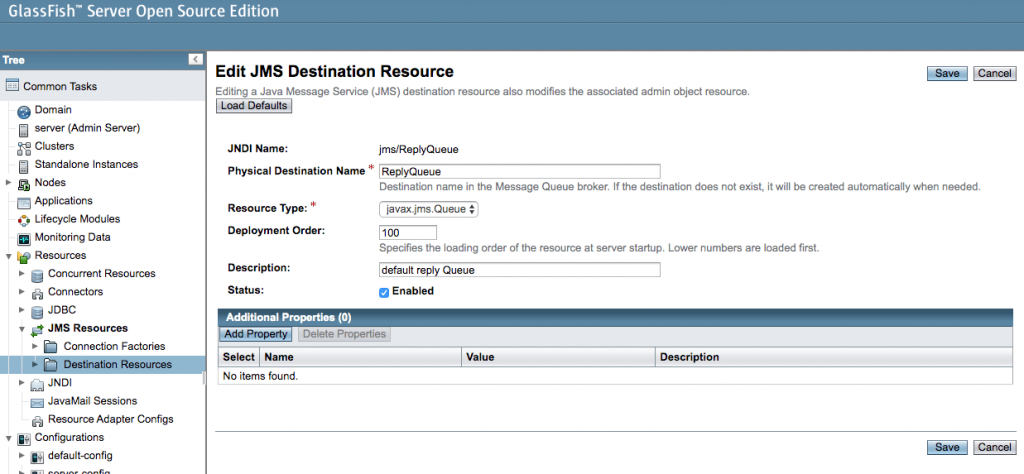
- Create the queue2 with JNDI name as
jms/ReplyQueueand destination name asReplyQueue.
- Then, create the pub-sub Topic with the JNDI name as
jms/PubSubTopicand the destination name asPubSubTopic.
Ideally, the destination resources and ConnectionFactory are created by the server admin. You as a developer need not create them in a real worl scenario. But for development or testing purpose you will need to create them on your local machines.
Just reiterating the above quote. No matter which JMS Provider you use, the ConnectionFactory and Destination are always needed to be provided by them. This means they need to be configured in the JMS providers before we write our Java code. You will learn about them in the latter part of this tutorial in detail. There are some exclusions like ActiveMQ that allows Destination creation at runtime.
Once you create the destination resources, JMS destination resources will look like the below screenshot.
Steps to configure your IDE
All the code examples are available on GitHub for download. Alternatively, you can follow along to create a maven project with the dependency listed below.
Step-1, Create a maven project
- Create a maven project in your IDE (Eclipse, STS or IntelliJ) of
<packaging>jar</packaging> - Open the
pom.xmland set the right java version. I am using JDK 8 for this project.
    <properties>
        <maven.compiler.target>1.8</maven.compiler.target>
        <maven.compiler.source>1.8</maven.compiler.source>
        <java.version>1.8</java.version>
    </properties>
Step-2, Add the JMS dependencies in pom.xml
- Add the dependencies needed to communicate with the Glassfish Server. Basically you will need to add 3 dependencies
gf-client,imqjmsraandjavax.jms-api. Will also addjunit-jupitor-apifor running the@Testcodes.
<dependencies>
    <dependency>
        <groupId>org.glassfish.main.appclient</groupId>
        <artifactId>gf-client</artifactId>
        <version>5.0</version>
    </dependency>
    <dependency>
        <groupId>org.glassfish.mq</groupId>
        <artifactId>imqjmsra</artifactId>
        <version>5.1</version>
    </dependency>
    <dependency>
        <groupId>javax.jms</groupId>
        <artifactId>javax.jms-api</artifactId>
        <version>2.0.1</version>
    </dependency>
    <dependency>
        <groupId>org.junit.jupiter</groupId>
        <artifactId>junit-jupiter-api</artifactId>
        <version>5.2.0</version>
    </dependency>
</dependencies>
Step-3, Create the jndi.properties file
- Create a file for JNDI lookup as
src\main\resources\jndi.properties - Add the JMS related configuration in this file as shown below
java.naming.factory.initial=com.sun.enterprise.naming.SerialInitContextFactory
java.naming.factory.url.pkgs=com.sun.enterprise.naming
java.naming.factory.state=com.sun.corba.ee.impl.presentation.rmi.JNDIStateFactoryImpl
You can also download the entire working code example from the GitHub repository.
Once you complete the setup of Glassfish for JMS, proceed to the next article to learn Send and Receive a message in JMS.